mercredi 21 septembre 2011
Burn photos to DVD with Windows 7
Do you like this story?
The DVD creation software built into Windows 7 is very limited in its functions but it is very easy to use and allows for the most part as burn photos and slideshow.
Add items
From the Start menu, click All Programs and then click the option Create a Windows DVD.
The screen "Keep your digital memories" appears, click Choose Photos and Videos.
Therefore, you have three options to add content:
- Click Add items and browse the folders on your PC to open files
- Open a folder, then click left on the library in question and select the files (if more than one, click it with the CTRL key) and then drag in the project window.
- Open a previously saved. To do this, click the "Open a project file" from the File menu. If you want to change the order of items, then click on the arrows Up and Down the toolbar.
Mount your photos as a slide show
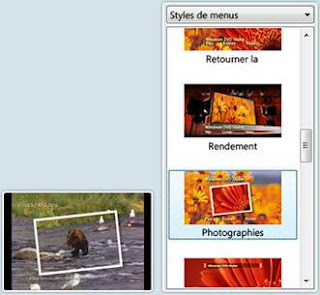
Then click Next. The software creates a default menu for the DVD. Choose another model needed in the column menu styles:

Click Custom menu, change the options and click Preview to see the result.
When you're satisfied, click Modify Style. You can also change the menu text. The photos will then be compiled into a slideshow. You can change the display time of images, select a transition and background music ... Click Preview to check the result and finally change the slide once satisfied.
Burn your work
Insert a blank disc into the drive, a CD or DVD for single use or rewriteable. The default software is that it gives no indication of total capacity required. You have to calculate yourself the size of your project by adding 10% for safety.
Attention, the burning process starts at the click Burn, it starts collecting information and formatting - phase during which you can click Cancel without damaging your CD or DVD.
Inscription à :
Publier les commentaires (Atom)


0 Responses to “Burn photos to DVD with Windows 7”
Enregistrer un commentaire